Session 04 - CSS, Part 2 - including Flexbox
Harvard Extension School
Fall 2022
Course Web Site: https://cscie12.dce.harvard.edu/
Topics
- CSS Review
- CSS Specificity
- Box Model
- CSS calc()
- CSS Remedy, Normalize, and Reset
- CSS Flexbox
- CSS Flexbox and Grid
- CSS Flexbox
- Lists as Navigation
- Two approaches - border or content?
- Working an Example
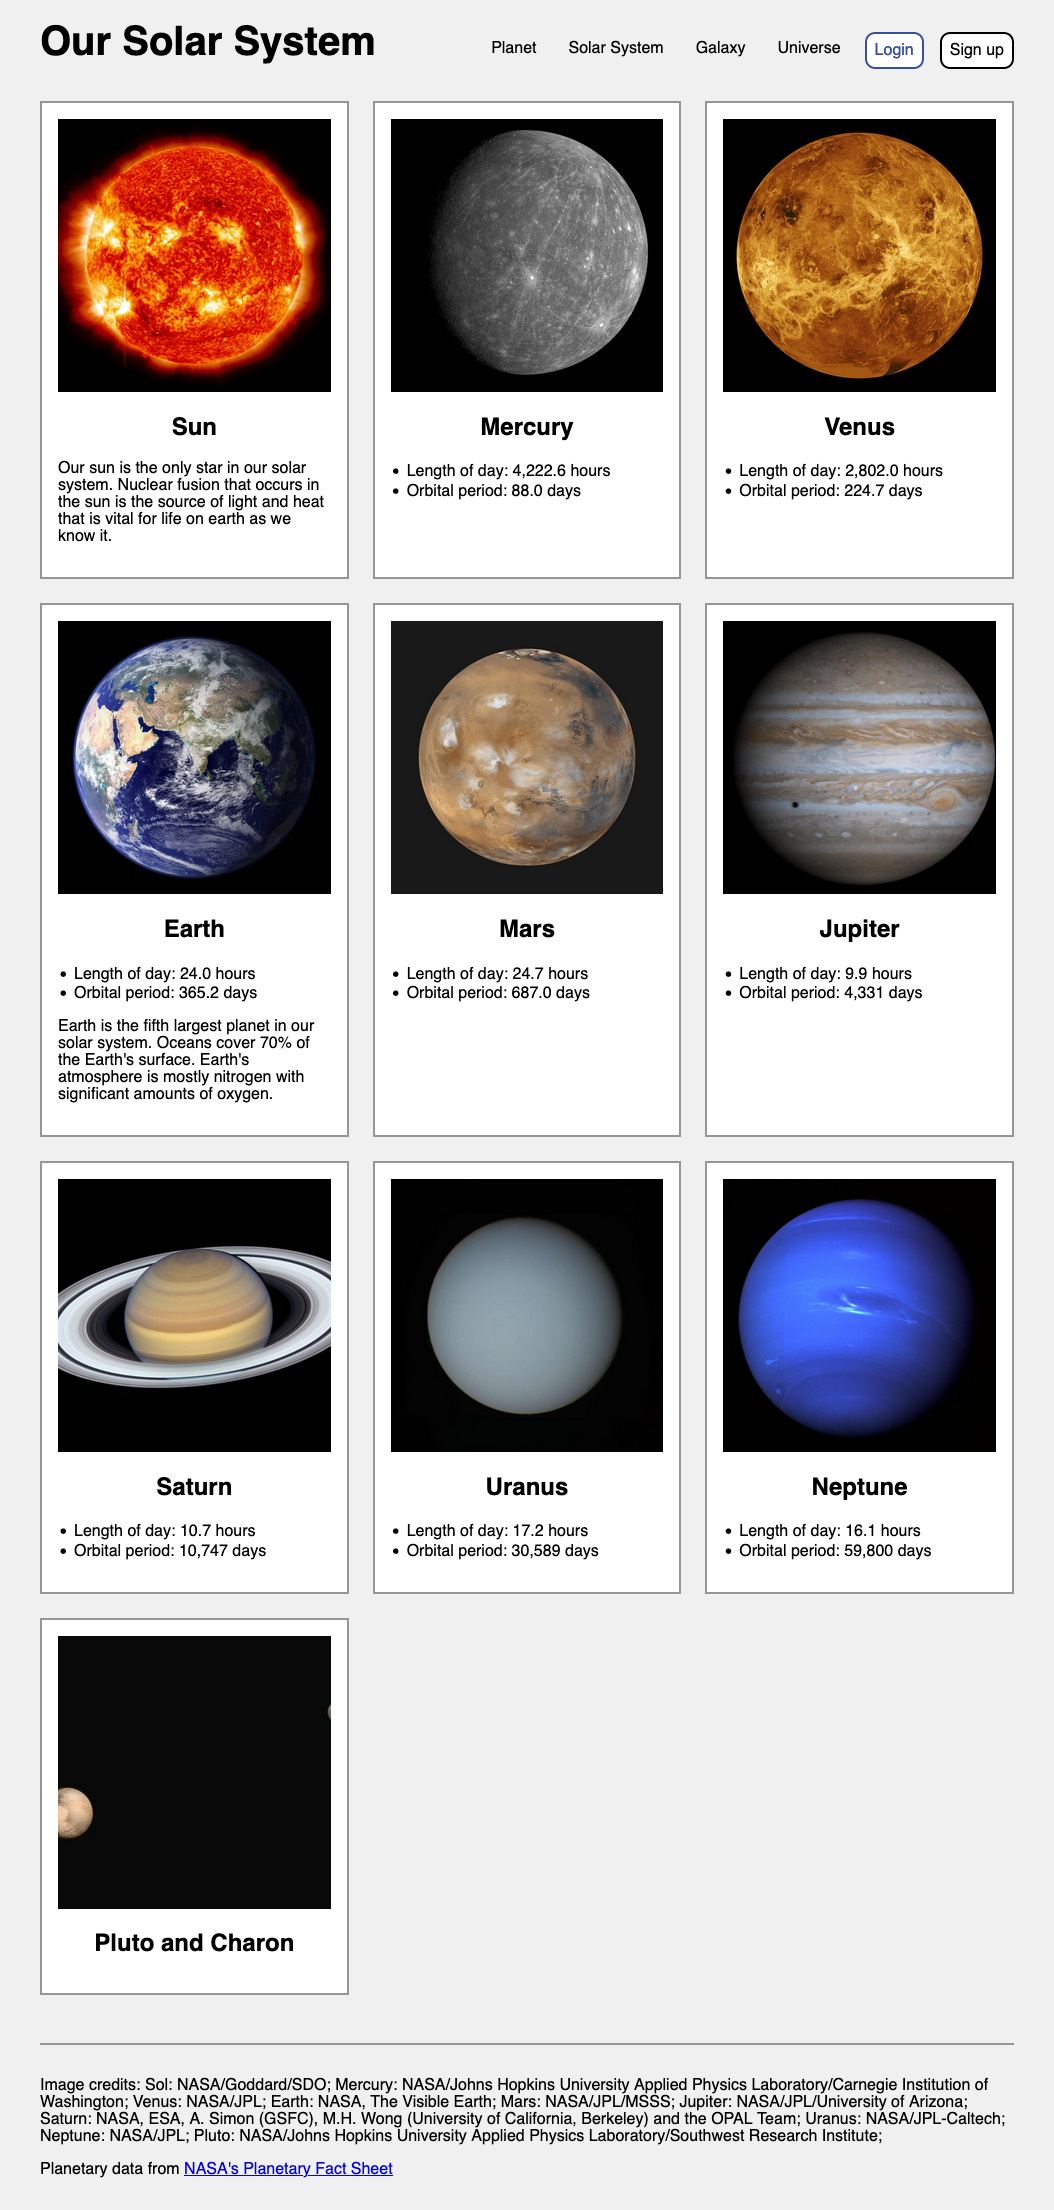
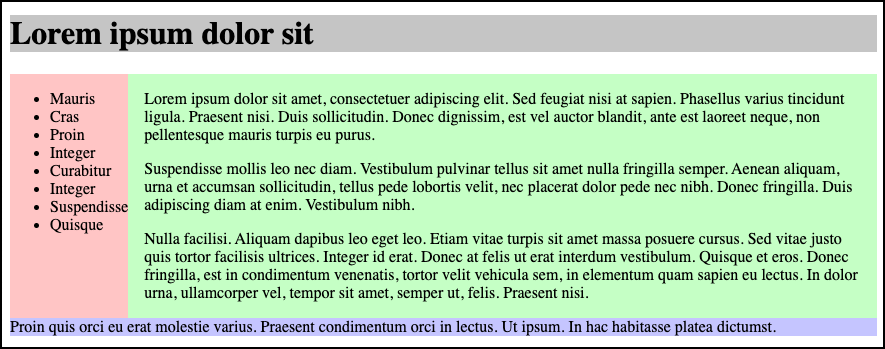
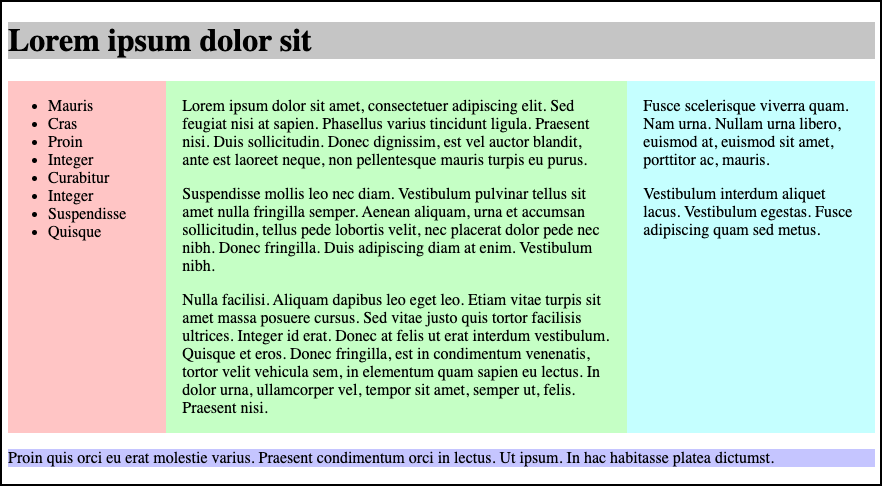
- Flex and Simple Layouts
Presentation contains 28 slides
CSS Review
Client-side Web Parts: Structure, Style, Function
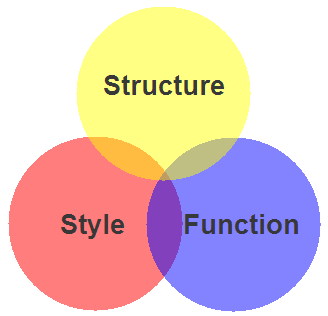
- Structure / Markup (HTML)
- Structure
- Content
- Style / Presentation (CSS)
- Style
- Presentation
- Appearance
- Function (JavaScript)
- Actions
- Manipulations
CSS Guides and Reference and Tools
- CSS: Cascading Style Sheets | MDN
- CSS reference | MDN
Your Browser's "Inspect" function!

CSS Validator
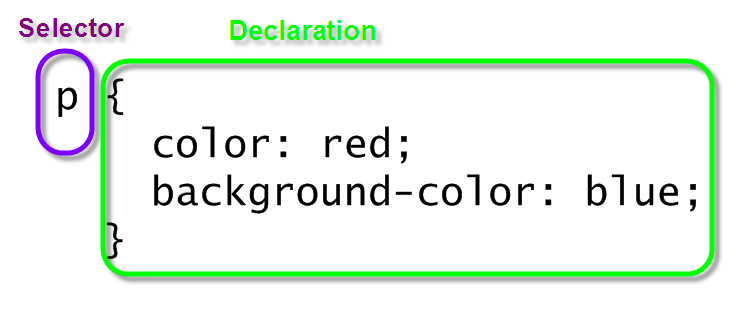
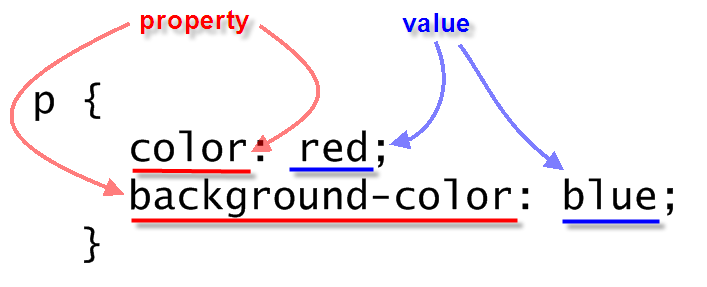
Anatomy of a CSS Rule
CSS Rule

Selector and Declarations
Properties and Values
CSS selectors - elements, class, id, and contextual
- elements
- class / id
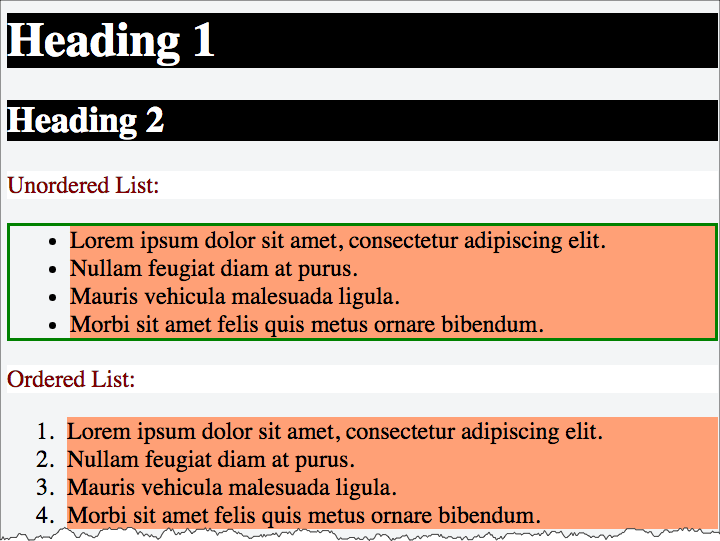
element selectors
p {
background-color: white;
color: maroon;
}

ul {
border: medium solid green;
}

li {
background-color: lightsalmon;
}

h1,
h2,
h3 {
background-color: black;
color: white;
}
class selectors
When to use classes?
- Within a page, there are elements that are the "same" from a markup perspective, but need to be styled differently.
- Within a site, there is content that has the "same" markup, but needs to be styled differently.
section  {
    background-repeat: no-repeat;
    background-size: 80px;
    padding-left: 100px;
    padding-bottom: 1.5rem;
}
section h2 {
   color: rgb(163,28,48);

}
section.html {
    background-image: url(../images/logo-html5.png);
}
section.css {
    background-image: url(../images/logo-css3.png);
}
section.javascript {
    background-image: url(../images/logo-js.png);
}

Contextual Selectors
selector1 selector2 { ...rules... }
Often you'll see this as ways to apply different rules in header,
main, and footer
main p {
/* rules for p inside of main */
}
footer p {
/* rules for p inside of main */
}
h2 {
/* rules for h2 everywhere*/
}
section h2 {
/* rules for h2 inside of section */
}
nav a:link,
nav a:visited,
nav a:hover,
nav a:active {
  /* rules for nav links */
}
footer a:link,
footer a:visited,
footer a:hover,
footer a:active {
  /* rules for nav links */
}
Example of "li em" selector
 <div>
   <em>Emphasized text   </em>outside of
   <strong>li   </strong>appear "normal".
   <ul>
     <li>
       <em>Emphasized text       </em>within
       <strong>li       </strong>have a different style.
     </li>   </ul>
 </div>
In style
element
(<style>) within head element:
li em { color: red; background-color: navy;}

CSS Specificity
See: Calculating a selector's specificity.
Stylesheet Origin
- author stylesheet
- reader (user) stylesheet
- browser (user agent) stylesheet
Specificity of Selector
- style attribute
- count "id" attributes
- count number of other attributes ("class")
- count element names
Order
- last occurence has higher specificity
@import-ed stylesheets come before rules in the importing sheet.
CSS Selector Specificity
Specificity is expressed in a form of a list of four numbers: (a,b,c,d)
- inline style
- id
- class, pseudo-class and attributes
- element and pseudo-elements
Start comparing at "a", if equal go to "b", etc.
nav li {...}                     /* (0,0,0,2) */
nav.primary {...}                /* (0,0,1,1) */
nav.primary li {...}             /* (0,0,1,2) */
nav.primary li:first-child {...} /* (0,0,2,2) */
nav.primary li.getinfo {...}     /* (0,0,2,2) */
#globalnav {...}                 /* (0,1,0,0) */
#globalnav >nav.primary li.getinfo >nav.primary li:first-child >nav.primary li >nav.primary >nav li
Specificity
And for a fun take on CSS Specificity, take a look at CSS SpeciFISHity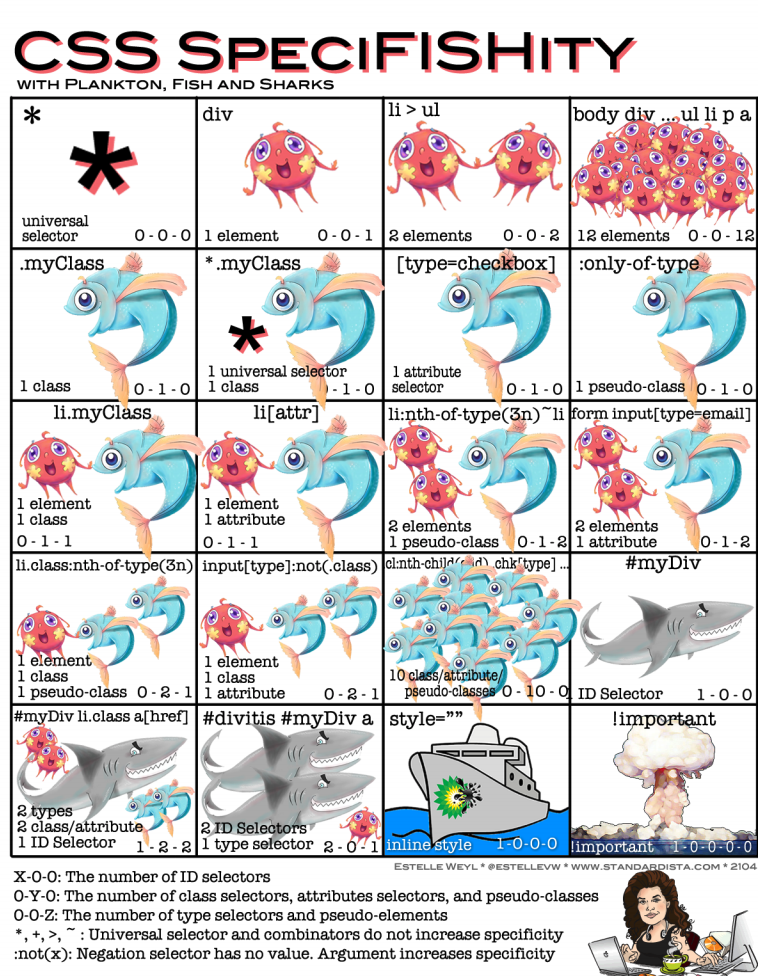
Box Model
- margin
- border
- padding
- content
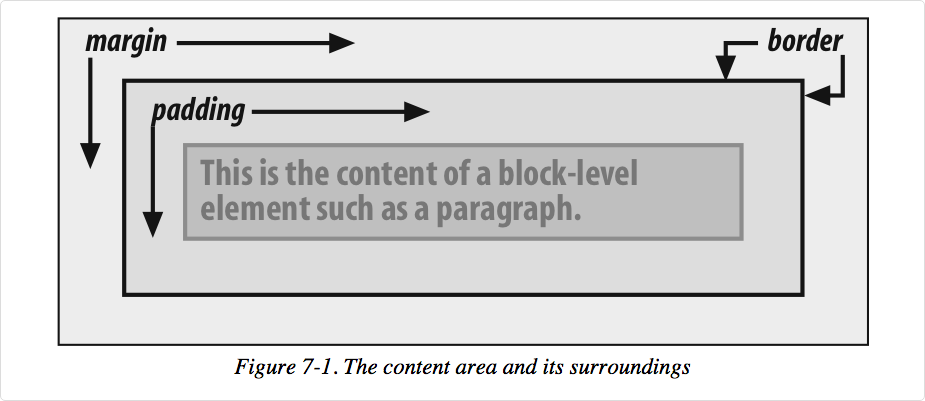
A more detailed look:
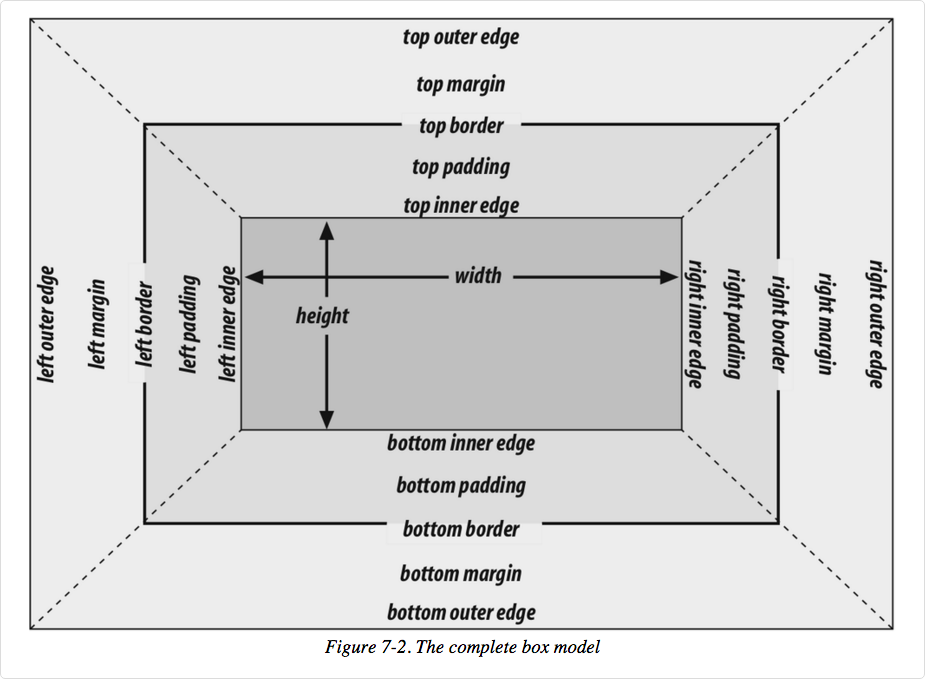
Image from Cascading Style Sheets: The Definitive Guide, 3rd ed by Eric Meyer, published by O'Reilly
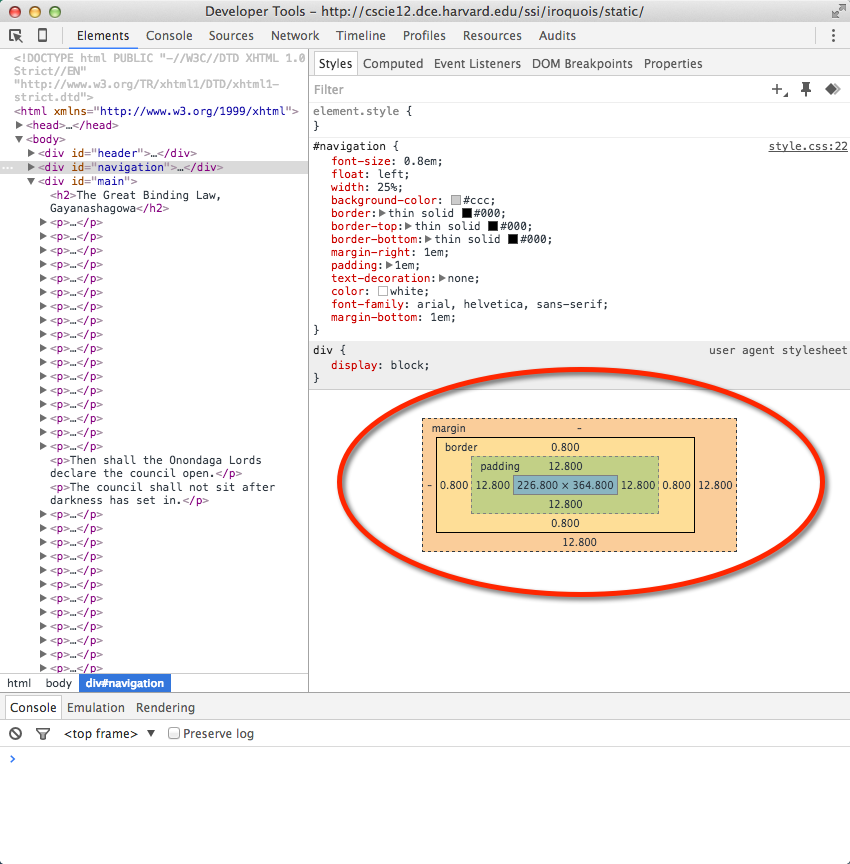
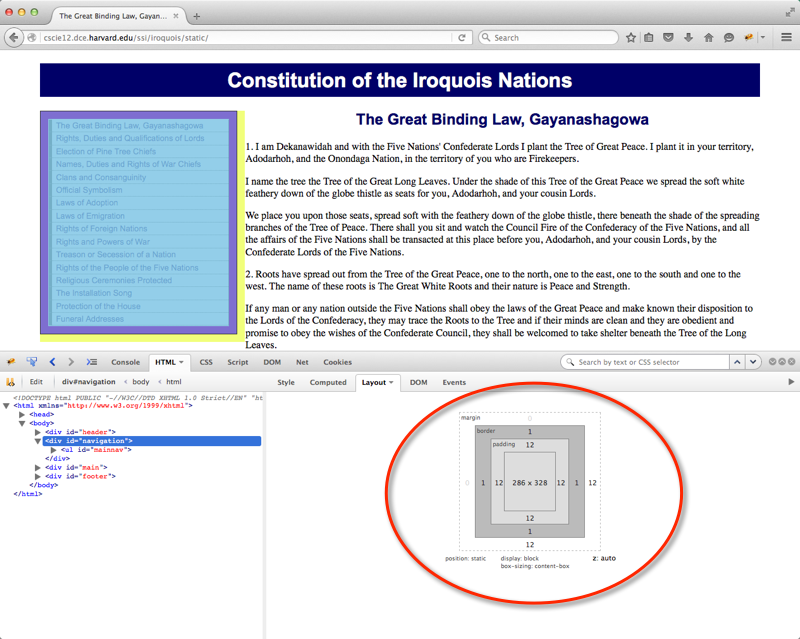
In your browser
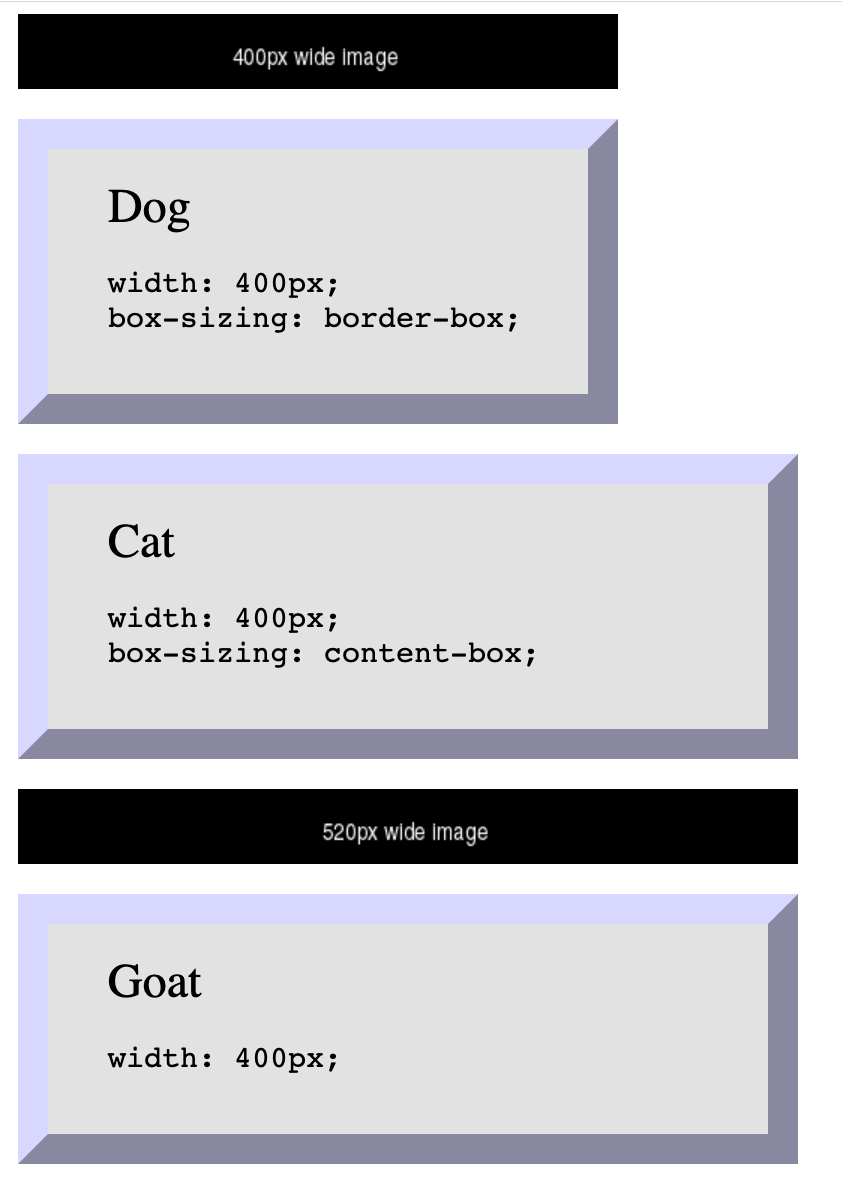
Box Sizing - How do you measure width?
By default, box sizing (width or height) is measured in terms of the "content-box". So any padding or border is "in addition to" the width set in CSS.
Use box-sizing property to make box widths
behave more like what you expect.
 <img src="https://via.placeholder.com/400x50/000000/ffffff.png?text=400px+wide+image"/>

 <div class="dog sizing">Dog
   <pre>width: 400px; box-sizing: border-box;   </pre>
 </div>
 <div class="cat">Cat
   <pre>width: 400px; box-sizing: content-box;   </pre>
 </div>
 <img src="https://via.placeholder.com/520x50/000000/ffffff.png?text=520px+wide+image"/>

 <div class="goat">Goat
   <pre>width: 400px; /* default box-sizing, which is content-box */   </pre>
 </div>
In style
element
(<style>) within head element:
  .dog {
    box-sizing: border-box;
  }
  .cat {
    box-sizing: content-box;
  }
  .goat {
    box-sizing: unset;
  }
  div {
    margin: 20px;
    font-size: xx-large;
    background-color: rgb(230,230,230);
    padding: 20px 40px;
    text-align: left;
    width: 400px;
    border: 20px outset rgb(220,220,255);
  }
  div pre { font-size: x-large;}

  img { margin-left: 20px;}
When 25% is not 1/4 of the screen
 <div class="full">
   <p>Container - 100%
   </p>
   <div class="quarter">One (25%)
   </div>
   <div class="quarter">Two (25%)
   </div>
   <div class="quarter">Three (25%)
   </div>
   <div class="quarter">Four (25%)
   </div>
 </div>
In style
element
(<style>) within head element:
  div.quarter {
    width: 25%;
    border: 2px dashed purple;
    background-color: rgb(240, 200, 240);
    float: left;
    overflow: auto;
    text-align: center;
    padding-top: 1rem;
    padding-bottom: 1rem;
  }
  div.full {
    width: 100%;
    border: 2px solid black;
    overflow: auto;
  }
 <div class="full">
   <p>Container - 100%
   </p>
   <div class="quarter">One (25%)
   </div>
   <div class="quarter">Two (25%)
   </div>
   <div class="quarter">Three (25%)
   </div>
   <div class="quarter">Four (25%)
   </div>
 </div>
In style
element
(<style>) within head element:
  div.quarter {
    width: 25%;
    box-sizing: border-box;
    border: 2px dashed purple;
    background-color: rgb(240, 200, 240);
    float: left;
    overflow: auto;
    text-align: center;
    padding-top: 1rem;
    padding-bottom: 1rem;
  }
  div.full {
    width: 100%;
    border: 2px solid black;
    overflow: auto;
  }
* { box-sizing: border-box; }
It is a common practice to set box-sizing property to "border-box" for all elements
* { box-sizing: border-box; }
CSS calc()
CSS calc() function give a way to calculate values. See: calc() function on MDN
width: calc(33.33% - 2rem);
 <ul>
   <li>Item One
   </li>
   <li>Item Two
   </li>
   <li>Item Three
   </li> </ul>
In style
element
(<style>) within head element:
  ul, li { margin-left: 0; padding-left: 0;}
  ul { list-style: none; overflow: auto; background-color: #ffffdd; border: thin solid black;}
  li { box-sizing: border-box;
    padding: 1rem; margin: 1rem; float: left;
    width: calc(33.33% - 2rem);
    font-weight: bold; text-align: center; border: 5px dotted green; }
CSS Remedy, Normalize, and Reset
Sometimes default browser behavior helps, sometimes it gets in the way. Three approaches are:
- CSS Remedy
- CSS Normalize
- CSS Reset
Three approaches:
- CSS Remedy / Sensible Defaults: free yourself from history and provide a remedy for CSS legacy 'mistakes'; provide yourself with sensible starting point and defaults.
- CSS Normalize: give yourself consistency across browsers.
- CSS Reset: give yourself a "blank slate" to build upon; that is, effectively remove all browser default styles.
Examples
- Basic Markup
- Jen Simmons's "CSS Remedy" — Basic Markup with Jen Simmons's CSS Remedy
- Eric Meyer's Reset CSS — Basic Markup with Eric Meyer CSS Reset
- normalize.css project — Basic Markup with CSS Normalize
- Andy Bell's "A Modern CSS Reset" — Basic Markup with Andy Bell's Modern CSS Reset
CSS Flexbox
Flexbox is a one-dimensional layout method for arranging items in rows or columns. Items flex (expand) to fill additional space or shrink to fit into smaller spaces.
When to use it: Building simple page or content layouts without
having use float or positioning.
CSS Flexbox and Grid
Flexbox
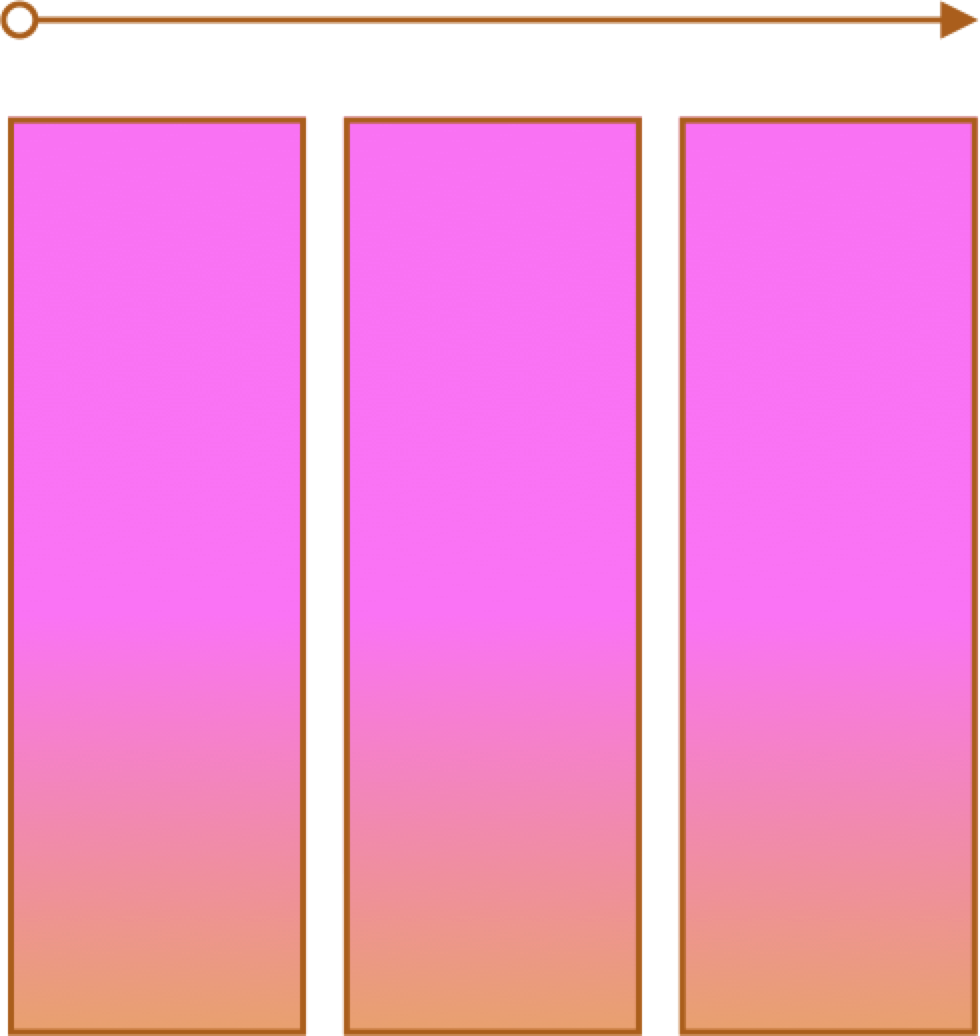
- One primary axis
- Basic layouts for pages and content
- Easier then "grid" (?)
Grid
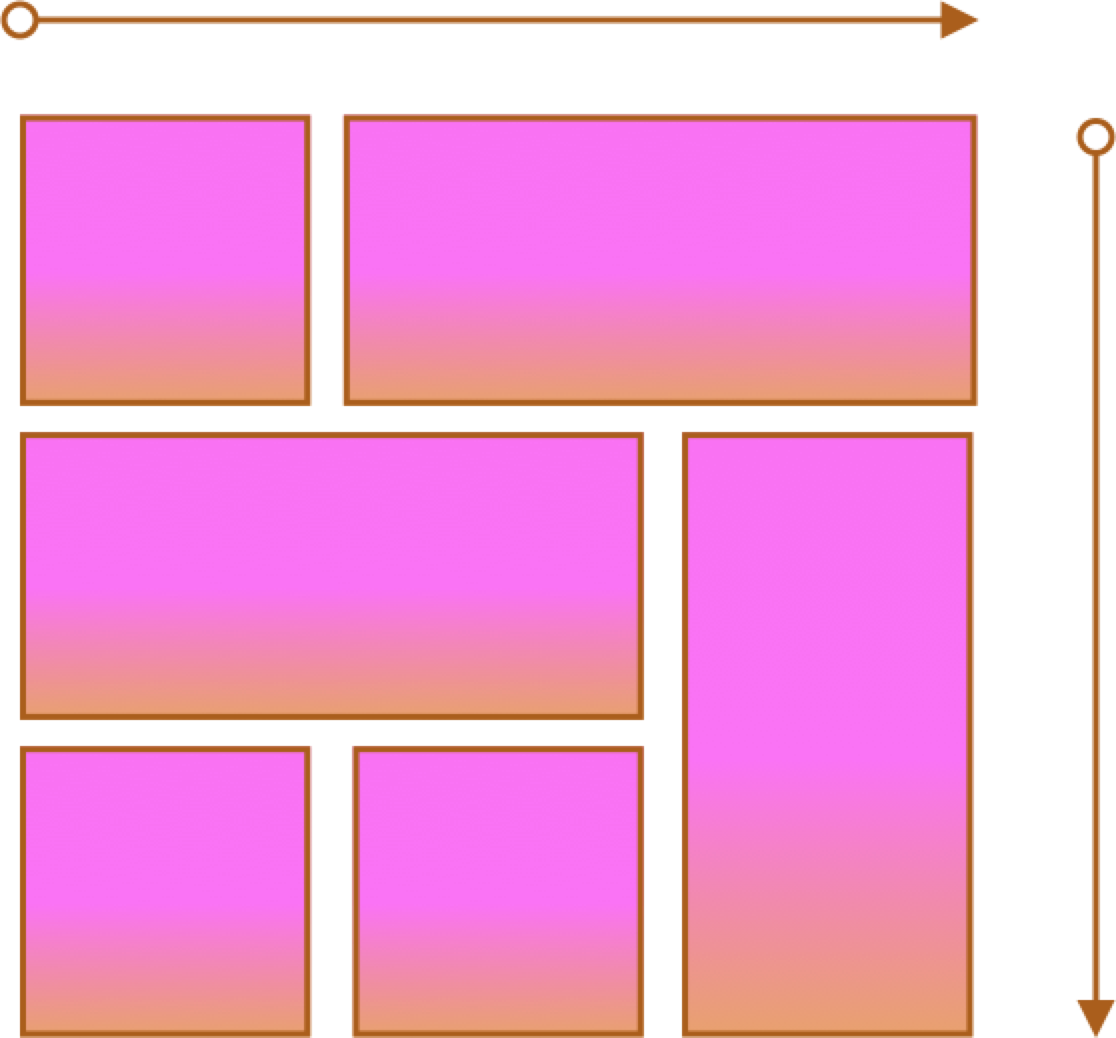
- Two axes
- More complex layouts
- Overlapping items
CSS Flexbox
Container and Items
- Set up your flex container and properties of the container.
- Set the "flex" properties on the items within your container.
 <div id="f3container">
   <div class="box box1">1
   </div>
   <div class="box box2">2
   </div>
   <div class="box box3">3
   </div>
   <div class="box box4">4
   </div>
   <div class="box box5">5
   </div>
 </div>
In style
element
(<style>) within head element:
#f3container {
  display: flex;
}
.box1, .box2, .box3, .box4, .box5 {
  flex-grow: 0;
  flex-shrink: 0;
  flex-basis: 5em;
}
.box1 { background-color: lightpink;}
.box2 { background-color: lightsteelblue;}
.box3 { background-color: wheat;}
.box4 { background-color: plum;}
.box5 { background-color: palegreen;}
.box {
  padding: 2em;
  border: medium solid black;
  width: 3em;
}
flex-basis
Controls the initial size of the flex item
 <div id="f4container">
   <div class="box box1">1
   </div>
   <div class="box box2">2
   </div>
   <div class="box box3">3
   </div>
 </div>
In style
element
(<style>) within head element:
#f4container {
  display: flex;
}
.box1 {
  flex-basis: 15%;
  background-color: lightpink;
}
.box2 {
  flex-basis: 25%;
  background-color: lightsteelblue;
}
.box3 {
  flex-basis: 50%;
  background-color: wheat;
}
.box {
  padding: 2em;
  border: medium solid black;
  width: 3em;
}
flex-grow and flex-shrink
Controls if and how the flex item will grow or shrink from its original flex-basis size.
 <div id="f5container">
   <div class="box box1">1
   </div>
   <div class="box box2">2
   </div>
   <div class="box box3">3
   </div>
 </div>
In style
element
(<style>) within head element:
#f5container {
  display: flex;
}
.box1 {
  flex-grow: 1;
  flex-shrink: 1;
  flex-basis: 200px;
  background-color: lightpink;
}
.box2 {
  flex-grow: 1;
  flex-shrink: 1;
  flex-basis: 100px;
  background-color: lightsteelblue;
}
.box3 {
  flex-grow: 1;
  flex-shrink: 1;
  flex-basis: 500px;
  background-color: wheat;
}
.box {
  padding: 2em;
  border: medium solid black;
  width: 3em;
}
Flex and Wrap
Controls whether flex items will "line wrap" — by default flex items do not wrap!
 <div id="f6container">
   <div class="box box1">1
   </div>
   <div class="box box2">2
   </div>
   <div class="box box3">3
   </div>
   <div class="box box4">4
   </div>
   <div class="box box5">5
   </div>
   <div class="box box6">6
   </div>
 </div>
In style
element
(<style>) within head element:
#f6container {
  display: flex;
  flex-wrap: wrap;
  justify-content: space-evenly;
  background-color: linen;
  border: thin solid black;
}
.box1, .box2, .box3, .box4, .box5, .box6 {
  flex-grow: 0;
  flex-shrink: 0;
  flex-basis: 28%;
  box-sizing: border-box;
  margin: 1rem 0;
}
.box1 { background-color: lightpink;}
.box2 { background-color: lightsteelblue;}
.box3 { background-color: wheat;}
.box4 { background-color: plum;}
.box5 { background-color: palegreen;}
.box6 { background-color: turquoise;}
.box {
  padding: 2em;
  border: medium solid black;
}
When working with images, max-width is your friend!
Lists as Navigation
Commonly use nav and ul, with
ul being the flex container.
 <nav>
   <ul>
     <li>
       <a href="#">Planet       </a>
     </li>
     <li>
       <a href="#">Solar System       </a>
     </li>
     <li>
       <a href="#">Galaxy       </a>
     </li>
     <li>
       <a href="#">Universe       </a>
     </li>   </ul> </nav>
In
head element:
<link rel="stylesheet" href="example10.css"/>nav ul { display: flex; }
nav ul { list-style: none;
}
nav ul li { margin-left: 1em; }Two approaches - border or content?
When doing navigation, how about a "border" or "content" property?
Border
See the Pen Navigation - horizontal with border by David Heitmeyer (@dpheitmeyer) on CodePen.
Content
See the Pen Navigation - horizontal with border by David Heitmeyer (@dpheitmeyer) on CodePen.
Working an Example
